

Lino printing in the afternoon
- Pewsham Belle

- Mar 27, 2022
- 2 min read
Updated: Aug 16, 2022
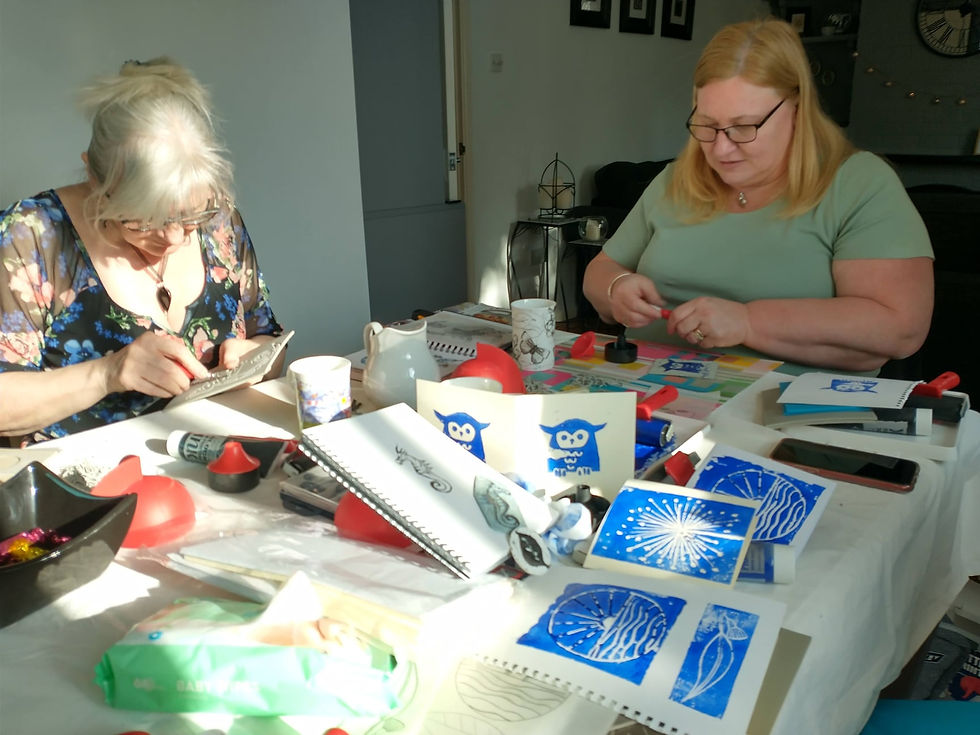
Five Crafty Crew members tackled lino printing as their latest technique with some success this weekend. It turned out several members had kits lying unused just waiting to be used in a group activity! Diane showed the lino printed wedding invitation her son and partner had made and after our experiences from the session we marvelled later at how clean and even their print was. Read on for our top tips on how this can be achieved.
With a bit of light googling and previous artwork to hand for inspiration, lots of different designs and cards were produced in one afternoon. With workshops costing around £50 to £70 and starter kits priced at around £20, this turned out to be a bargain!
As well as providing our own kits, Wendy brought along her sketchbook which provided some paper for our initial design work and for final printing; Angela brought along some tracing paper, card blanks and a variety of coloured inks. With all our equipment to hand and Diane throwing over a huge cloth over her dining table for protection, we were ready to start!
Angela has several top tips:
Use tracing paper to transfer the design. This is especially useful for those not so confident with copying their designs straight onto the lino
Put the screw fitting onto the handle first before attaching the cutting blade and then tighten the screw - it doesn't fit over if the blade is inserted first
It's easy to get inky fingers with this process, so keep some baby wipes or a damp cloth/kitchen roll to hand. They can also be used to clean off the lino at the end of the session
It's worth buying an additional roller which is kept dry and pressed on the back of the lino for a more even print
She also purchased a separate pack of colours to supplement the black ink which comes with the pack. From a previous workshop, Michelle recalls these can be mixed together to provide a whole rainbow of printing options. Lino can also be purchased separately for future makes and we found there's quite a difference between the more traditional lino and the softer version now available.
Before they started Michelle mentioned that it's key to think carefully about which parts of the design require ink as these will not be cut away. Wendy had brought along a flower design which showed the differences between the flower itself being printed from a raised form, or it being cut away and used as a negative print. Wendy's top tip is to do some test prints first as they reveal which parts of the lino require further cutting away for a clean print.
The Crew were relieved to find the ink provided is water based, so it's easy to clean the equipment afterwards.

In the space of a couple of hours, the Crew made lots of different designs and a few cards. Gill thought a simple Christmas tree design with green ink would make a fantastic homemade Christmas card. It can take a while for prints to dry, so some thought about where and how to do this is needed, especially if going into mass production.


Comments